The E-Learning Curve Blog has moved!

You will be automatically redirected to the new address in 10 seconds. If that does not occur for some reason, visit
http://michaelhanley.ie/elearningcurve/
and update your bookmarks.

Showing posts with label audio editor. Show all posts

Monday, September 21, 2009

Multitrack audio and creating MP3 podcast files: Podcasting for E-Learning

Today's post about Podcasting for E-Learning covers editing and rendering multitrack audio using the open-source audio editor Audacity.

Click on the play button on the YouTube video to view the demo at 240x320 size (which will give you an overview of the editing techniques I'm using), or click here to view the demo (1024x768, broadband connection recommended) to see the editing techniques in detail. The demo is about seven minutes in duration, and requires Flash Player version 7 or better.

Typically, a podcast has a number of discrete audio tracks:

  • Musical signature tune track
  • Narration voice-over (v/o)
  • Incidental music and / or wildtrack (ambient sounds such as keyboard taps, phones ringing etc)

To create, edit and render a multitrack audio file (called a 'package'):

  1. Open and save a new Audacity project
  2. Name it something like 'My_Podcast_Final'
  3. Using the File menu, open the first track to be played in the sequence (usually the sig tune)
  4. Using the Project >> Import Audio menu add the rest of your clips. Each clip will open on a new track in the Audacity UI
  5. Using the Timeline Shift Tool to move the new tracks to their approximate location on the timeline; you'll refine their location later
  6. Use the Envelope Tool to set the volume at appropriate levels for cross-fades, fade-ins, fade-outs, and for setting music as a soundbed under the voice-over narrative
  7. When you have all the elements of the package aligned to more-or-less where you want them, use the Timeline Shift Tool to refine the timing of the various elements - try to make the clips as "tight" as possible: omit any long silences or caesurae unless they're for dramatic effect.
    If your audience hear a long silence they may well think that they have reached the end of the package and turn off.
  8. Once your package is edited satisfactorily, save it.
  9. Next go to File >> Export as MP3
  10. Enter appropriate metadata in the dialog box and click on Save.
  11. An MP3-formatted version of your project file is rendered according to the settings entered in the Preferences tab.
  12. You're done!
  13. Make a cup of your favorite hot beverage
  14. Open the audio package in your software media player. Sit back and listen to your completed magnum opus.
  15. Start thinking about a topic for your next podcast, which will be even better than this one!

More...
--

Friday, September 18, 2009

Demonstration: Editing an Audio File. Podcasting for E-Learning

Today's post is a demonstration describing how to edit an audio file using the Audacity open-source non-linear sound editor.

Click on the play button on the YouTube video to view the demo at 240x320 size (which will give you an overview of the editing techniques I'm using), or click here to view the demo(1024x768, broadband connection recommended) to see the editing techniques in detail. The demo is about six minutes in duration, and requires Flash Player version 7 or better.

Now, some context: in my previous post in this series about Podcasting for E-Learning, I described the pre-edit stage of post-production.

In that post I discussed audio has been recorded, the master file was saved and imported into your audio editor. Next I described how the sound file was to be “cleaned up” by ensuring the file was:

  1. Topped & tailed
  2. Normalized
  3. NRed
  4. EQed
  5. Saved as an "_edit" version.

Now, you can actually edit the audio content. mhc_elearning_curve_podcast_150x150

Broadly speaking, this means applying edits to remove “umms,” and “ahhs,” coughs, bad (or repeated) takes, clicks, pops, and bangs – there will be many!

Today’s demonstration is a section of the master file from my E-Learning Curve Podcast episode Flash and Captivate. In this section of the narrative, I'm discussing the Flash format and its uses. In the demo I undertake the follow activities:

  1. Open the ‘_edit’ file
  2. Play back the narrative to understand what edits need to be made (the clip is about 15 seconds in duration)
  3. Make a note of the edits to be made (see bullets below)
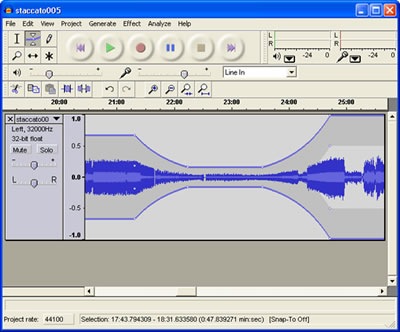
  4. Use various Audacity controls including the Rewind and Play buttons, Selection, Envelope and Zoom Tools, and the Crossfade Out effect to make edits in the file
  5. Play back the complete narrative with edits implemented (about 13 seconds in duration)
  6. Save the edited file

The master file includes the following elements to be modified or elided:

  • One repeated phrase
  • Two audible inhaled breaths
  • A series of small audible oral clicks
  • One large audible oral click
  • Noise at the end of the clip

More...

--

Monday, August 31, 2009

Audio for Podcasting: Hard Disk Recording

When digital audio first appeared, tape-based digital recorders using Digital Audio Tape (DAT) were the only viable system for recording DAT_logo the relatively large amount of data required by a digital audio recording system. This was because tape was less expensive to manufacture than hard drives, and tape was easy to store for later reuse. As hardware became more sophisticated, disk drives started to grow in capacity and performance, to a point where by the mid-1980's digital disk recorders started showing up in professional recording studios.

However, storage limitations and exorbitant costs meant that a 10MB drive could cost over $2000, and could hold only about a minute of audio. This worked great for MIDI and music sequencer applications like Cubase, running on the Atari ST computer (see Figure 1) but was insufficient for recording and editing high-quality voice-over narration.

atari_st_cubase

Figure 1. Start of an audio revolution: Cubase 1.0 for Atari ST
[Click to enlarge]

However, as computers became more powerful, so the hard disk capacity used to store data on a computer grew. Its now common to see disk drives that store 100, 200, or even 500 gigabytes (GB) of data. Storing digital audio on hard disk makes a lot more sense and in fact now the most affordable alternative. Today you can buy a one terabyte hard disk for about $300 that gives you hundreds of hours of stereo, 16-bit recording at a 44.1K sample rate.

Advantages of Hard Disk Recording
There are a variety of reasons why hard disk recorders are more versatile and powerful than their tape-based cousins. Advantages include:

  1. Instant access time. The most expensive part of most tape machines is the motors that control the motion of the tape, called the transport. Transports are often very complex mechanical devices with very precise tolerances. Since a tape machine has to physically move tape linearly across the tape heads, and shuttle the tape from beginning to end, a powerful and reliable transport is required. The better the transport, the faster you can get from one portion of the tape to another, which saves time.

    A hard disk drive does not have this limitation. Hard drives are now fast enough so that any data stored on a hard disk drive can be accessed in an instant of time. This means that locating any portion of a song can be done almost instantaneously since there is no tape to wind. The elimination of rewind and fast-forward locate time is a huge benefit of hard disk recording. The less time spent winding tape, the more time can be spent getting the best take recorded instead.
  2. Flexible and powerful editing. In tape-based systems, there are two methods of editing the audio on tape: re-recording over it, or physically cutting the tape. You can record over existing material on a tape deck or record between two tape machines insert new portions of audio or move audio into a new location. The problem with editing with tape this way is that in order to perform the edit you must wipe the original material by recording over it; this is sometimes referred to as "destructive editing". In addition, since you are recording, it takes at least as long as the length of the edit to perform it, that is, inserting a one-minute audio segment will take one minute.

    With hard disk based recording, the data that is on the disk can be re-arranged without having to be deleted. This is often called "non-destructive editing". The audio data on disk can be also be manipulated in many different ways. The power that a disk recorder provides over tape recorders in terms of editing is substantial.
  3. Processing the audio. In addition to editing the digital audio data stored on a hard disk (by cutting, copying and pasting), audio can be processed using software algorithms called digital signal processing or DSP. Using DSP, audio stored on hard disk can be stretched and squeezed, raised and lowered in amplitude, put on its head and turned inside out just by re-arranging the zeros and ones. Additionally, a DSP-based hard disk recorder provides one of the most substantial benefits of digital audio in the first place because audio can be manipulated and processed while remaining in the digital domain. The only practical way to perform DSP operations on digital audio is when it is stored on hard disk. Tape-based systems, with their linear recording processes makes advanced DSP features impractical to implement, regardless of tape format used.

Next time: Authoring your podcast using an audio editor.

--

Friday, August 14, 2009

Without Les Paul I wouldn’t be an E-Learning Professional

Les Paul, inventor, guitar legend and sound engineering genius Jimmy Page, 1959 Les Paul guitar, violin bow. Bliss.died yesterday.

While most of the tributes to this most rounded of individuals rightly focus on his contribution to music, both through his virtuosity on the guitar and his invention of his eponymous Gibson instrument. I'd like you to consider this: if you work in e-learning or digital media content development you probably wouldn't have a job without Les Paul’s influence and inventions.

Why?

He invented multitrack sound recording.

Multitrack recording (also known as multitracking for short) is a method of sound recording that allows for separate recording of multiple sound Tascam 16Tracksources to create a cohesive whole. Today, this is the most common method of recording popular music, radio documentaries, and podcasts. Back in the day, I learned to record sound to magnetic tape (including the black art of editing sound by physically splicing bits of tape together), before moving to DAT, mini-disc, and finally recording and editing audio in a purely digital environment about 10 years ago.

Today, I use multitracked audio to create podcasts for distribution on the web and via iTunes, demos, simulations, training videos, and a host of other learning applications.

All of these developments occurred because of Les Paul's innovations in multitracking 60 years ago. He was so influential that modern digital audio editors (and digital media editing tools like Adobe Premiere and Techsmith Camtasia) still use the multi-channel / multi-track timeline user interface paradigm, and still sport controls for cutting, splicing, and cross-fading the content stream, same as in the physical magnetic tape editing I used to do many years ago.

multitrack editor

Source audio for a podcast in a digital multitrack editor

"Big deal" I hear you say, "if he hadn't done it, someone else would have."

Maybe, but he did it. And it was his musical artistry and fame as a recording artist (with his then-wife Mary Ford) that popularized the technology in a way no 'man in a white coat' could ever have.

So thanks for the music, Les, and the guitar.

And the career. Requiescat in pace.

lespaul2

Les Paul (1915-2009)

--

Thursday, June 4, 2009

Using Media to Engage the Learner: Blatant Plug

Today's the day for my eLearning Guild Online Forum debut presentation. At 10:15am Pacific Time I'll be hosting an online session (via Adobe Connect) called Integrating Audio in to E-Learning Courseware.
As a teaser, here my session outline:

This session will cover:

  • Why use audio in e-learning?
  • Using non-linear editing tools
  • How to record audio
  • How to produce audio
  • How to integrate audio into commonly-used rapid e-learning applications

Here's the agenda for the full two days of the Lights, Camera, Action: Using Media to Engage the Learner event.

Opening General Session
Thursday, June 4 — 8:30a to 9:45a

  • Selecting Media for Learning: Thinking Inside and Outside the Box
    • Patti Shank, Learning Peaks LLC

Concurrent Session Block 2
Thursday, June 4 — 10:15a to 11:30a

  • 201 | Integrating Audio into E-Learning Courseware
    • Michael Hanley, CĂșram Software, Ltd.
  • 202 | Rich Media on a Poor Budget
    • Jeff Tillett, T-Mobile

Concurrent Session Block 3
Thursday, June 4 — 12:00n to 1:15p

  • 301 | Finding, Hiring, and Directing e-Learning Voices
    • Harlan Hogan, E-learningvoices.com
  • 302 | Rapid Video and User Generated Video
    • Mark Chrisman, T-Mobile

Concurrent Session Block 4
Friday, June 5 — 8:30a to 9:45a


401 | Creating Interactive Learning Experiences With Video in Flash

John Crider, Intuit, Inc

402 | Storytorials: An Instructional Strategy for e-Learning

Kevin Cassel, James Kinnamon & Pete Safran, SAI Global

Concurrent Session Block 5
Friday, June 5 — 10:15a to 11:30a

  • 501 | Sometimes a Video Isn't Just a Video
    • Stephen Haskin, S Media
  • 502 | Immersive Simulations that use Voice Technologies
    • Paul Howe, Allen Interactions

Closing General Session
Friday, June 5 — 12:00n to 1:15p

  • Cool Tools: Spice Up Your Training with Web 2.0 – Legally
    • Michelle Lentz, Write Technology

If you're participating, I hope to see you there (metaphorically speaking), and best of luck to all presenters as well as the backroom team of organizers and moderators who have worked so hard to make this event happen.

--

Tuesday, June 2, 2009

Integrating Audio into E-Learning Courseware: eLearning Guild Online Forum

The eLearning Guild's next Online Forum taking place on June 4th & 5th is called Lights, Camera, Action: Using Media to Engage the Learner.

Here's what the Forum will cover:

It wasn’t long ago that e-Learning developers thought that putting a simple Flash animation and a small sound file into their e-Learning offerings was really leading-edge stuff. But today much more advanced technology, like higher bandwidth, gaming, and ELG-OF immersive learning techniques, is easily available. And, ever-more-sophisticated learners, who are demanding more effective and absorbing e-Learning programs, are pushing for adoption of advanced media techniques.

This Online Forum will show you how to use audio, video, animation, and other technologies to enhance the engagement and “stickyness” of your e-Learning offerings. You’ll see real-life examples, and learn various design approaches for effectively using media. This Online Forum is your best chance to focus on improving the e-Learning you create for your organization, and to...

  • EXPLORE how using different media tools and processes can enhance your e-Learning offerings,
  • DISCOVER how better use of media enhances a wide variety of topics and formats,
  • EXAMINE the design and development of media-use techniques to achieve specific goals,
  • LEARN how other organizations are using media to build engagement into their e-Learning programs, and
  • ENSURE that your e-Learning meets both your learners’ and your organizations’ goals.

I'm pleased to announce that I will be presenting the Forum session on using ELG_Preview audio in e-learning. Called Integrating Audio into E-Learning Courseware, session participants will learn the audio production lifecycle, see examples and demonstrations, and get hints, tips, and tricks-of-the-trade to enable you to produce high-quality audio for your courseware. You’ll learn how recording subject matter experts as they describe a process, task, or activity, when well-recorded and produced can, in most cases, be integrated into courseware without taking the extra steps of hiring a professional voice-over artist to re-record the narration. This can lead to considerable savings in time and money, as well as reduce the time-to-market of courseware.

In this session, you will learn:

  • Why use audio in e-Learning?
  • The uses of non-linear editing tools
  • How to record audio
  • How to produce audio
  • How to integrate audio into commonly-used rapid e-Learning applications and podcasts

When learning with multimedia, research shows that visual imagery is better retained when accompanied by verbal information; that learners are better able to integrate information via multi-modal instruction. Called the Six Principles of Learning, it describes how information encoded and transmitted using both visual and auditory channels reduces the cognitive load on the learner, so their working memory can process information more effectively.

However, most e-learning professionals perceive that creating and integrating high-quality audio is a highly-specialized activity outside of their expertise. But now more than ever, e-learning technology and content production skills are a key requirement for learning professionals who wish to interact with their audience.

So join me on Thursday by clicking here to register for the event. if you haven't already registered, I'll be delighted to see you there.

--

Friday, May 2, 2008

Open Environment E-learning 5: Audacity Audio Editor

Having discussed a range of primary design and authoring tools, today's post will look at one of the key content development tools, an open source non-linear audio editor (NLE) called Audacity.

[It] is an easy-to-use audio recorder and editor for Windows, Mac OS X, GNU/Linux, and other operating systems .

(sourceforge.net)

Audacity has the capability to record live sound, convert analogue media sources, and manipulate audio. Its functions include:

  • Export to digital recordings like podcasts or CDs
  • Edit WAV, MP3, FLAC, and Ogg Vorbis sound files
  • Cut, copy, splice, and mix multiple audio files
  • Apply a range of digital signal processes including normalization, noise reduction, EQ, and compression

audacity audio editor

Figure 1 Audacity audio NLE

Audacity enables audio content may be exported in a wide range of formats, making it an exceptionally flexible tool for content developers. With a relatively shallow learning curve, the application can be used by non-experts after a few hours on instruction and use, while retaining the features found in proprietary NLEs like Steinberg WaveLab and Sony Sound Forge for media developers .

This level of functionality enables both SME and specialist content developers to take advantage of the features in the application in an Open Environment for E-Learning.

References:


Audacity website About Audacity [Internet] Available from: http://audacity.sourceforge.net/about Accessed 1 May 2008

--